Author: EdwardHamber
The Definition of RAID
RAID, acronym for Redundant Array of Independent Disks (originally Redundant Array of Inexpensive Disks), is a technology that provides increased storage functions and reliability through redundancy. This is achieved by combining multiple disk drive components into a logical unit, where data are distributed across the drives in one of several ways called "RAID levels".
The distribution of data across multiple drives can be managed either by dedicated hardware or by software. A software solution may be part of the operating system, or it may be part of the firmware and drivers supplied with a hardware RAID controller.
How to Create a Software RAID array in Windows 7
Step 1: Backup your information on the disks you want to use in the RAID.
Step 2: Click "Start", and right click "computer" and open "Manage".
Step 3: In the "computer management" Window, click on "Disk Management". Right click the disk you need to include in your RAID and choose "Delete Volume".
Step 4: All the disks will be in the pane under the disks which you don't want to include in the RAID.
Step 5: Right click on the first disk you want to include in your RAID and select "New Spanned Volume". (In Windows they don't call their RAID options by the traditional 0, 1, 5, 10 etc. Instead they use spanned, striped, and mirrored as the options.)
Step 6: A wizard pops up. Click "Next" and then select the disks you want to include in your new volume.
Step 7: Assign the new volume a mount letter or mount point. And name and format it, and then click "Next".
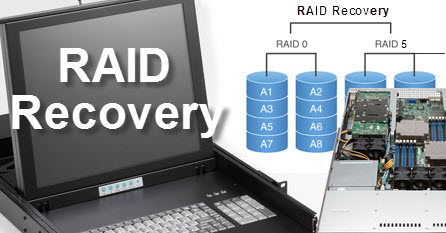
How to Recover RAID0 & RAID5 data
When your RAID drive begins to demonstrate faulty or unexpected behavior due to system crash, virus attack or power failure/surge, what you need to do is to find a reliable utility to recover RAID0,RAID5 data. RAID Recovery is such a powerful program that can recover RAID data including RAID 0, RAID 5. With the features of high speed and good quality, it is widely used by thousands of users around the word. Furthermore, it is easy enough for all levels of computer users, even novices.

Step 1: Download and install RAID Data Recovery software like Tenorshare Data Recovery on a separate disk from your lost data located. (You can get it from: http://www.any-data-recovery.com/product/datarecoveryenterprise.htm )
Step 2: Run this program, and select "RAID Recovery".
Step 3: Click "Add" to import the disks in your RAID partition. You are available to delete the loaded disks by ticking the disks and clicking "Remove".
Step 4: You should select the analyzing method to identify the possible RAID in which we lose our data.
Smart: It is highly recommended. Specify RAID layout and directly click "Next", and a window with possible RAID architectures appears. Choose the architecture you need to recover and click "OK".
Manual: If you know your stripe size and cyde way, try this way. Select RAID layout and enter the information it requires. And then click "Next" to recover RAID data.
Smart+Manual: Choose RAID layout and click "Intelligent Analysis". According to the results of possible RAID architectures, import the information about stripe size and cyde way to the fields. Click "Next".
Step 5: Select the files by ticking the boxes in front of the file info lines. Click "Recover". Or hit "Other operate"-"Copy files to…", and choose the path for save. In these two ways, you can recover the files currently saved on your corrupted RAID partition.
Or you can click "Other operate"->"scan the partition with deleted recovery mode". And then choose the location for recovered files. In this way, the deleted RAID files can be recovered.
Step 6: Click "OK" to finish RAID Recovery.
No comments:
Post a Comment